RoboCopy is the most popular and traditional way to copy and replicate files over a network on Microsoft Windows platforms. It uses the concept of timestamp and datestamp for the transfer of files which helps out in the tolerance of network interruptions. Many people avoid it because of the complexity of the command line. To overcome the CLI problem, you can use these 6 best RoboCopy GUI for Windows 11 and Windows 10.
RoboCopy GUI eliminates the chance of failure as it skips NTFS junction points as it happens due to infinite loops. It also replaces other copy commands with exceptional features. The concept it uses to copy different files simultaneously is multi-threading, which makes it faster than the standard copy and Xcopy.
RoboCopy GUI Vs CLI
As you already know, a GUI or graphical user interface is one where you can click and interact with options using a mouse or keyboard. On the other hand, a CLI or command-line interface is one where you have to type instructions in a terminal. Find out how RoboCopy GUI compares against the CMD version:
| RoboCopy GUI | RoboCopy CLI |
|---|---|
| Friendly graphiccal user-interface with easy navigation and buttons. | No graphical user interface and has to be used via commands. |
| GUI requires installation via third-party app. | Comes pre-installed and requires no third-party app to work. |
| Full functionality of RoboCopy switches including /MIR and /NJH. | Functionality is limited of the /MIR and other useful switches. |
| Easily resume copy jobs if interrupted with a click of a button and adds restart mode automatically. | You have to manually type in the full RoboCopy command with /Z to restart paused copies. |
| Ability save logs and history of previous transfers | Manually enable logging for earch transfer and no history is available if logging isn't enabled on any past transfers. |
It is quite clear from the comparison that RoboCopy GUI is easier to use and more user-friendly. The CLI version can put many beginners off track as some may not be comfortable with command-line interfaces. We have also seen that some switches are not fully unlocked in the CLI whereas GUI allows you full access.
RoboCopy GUI Features
RoboCopy GUI is not the same as the CLI and so the features are quite different. Below are the latest features:
- Ability to mirror one folder to the other, and delete files in a destination that are not present in the source folder via a graphical interface.
- Select and apply RoboCopy command switches with one click.
- Pre-specify that you can be done with the conflicting names.
- Schedule both copy and paste operations simultaneously.
- Easily track the progress via a percentage bar.
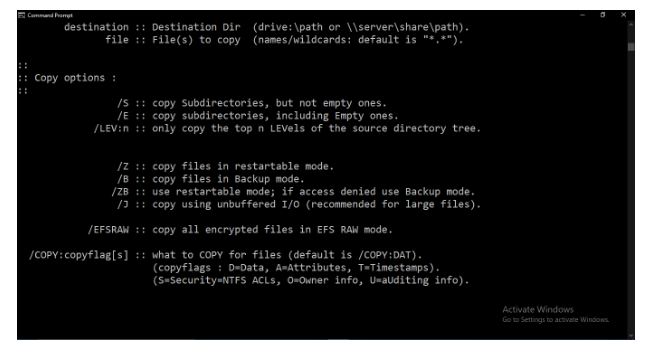
It has the following copy options available: /S, /E, /J, /ZB and /B.
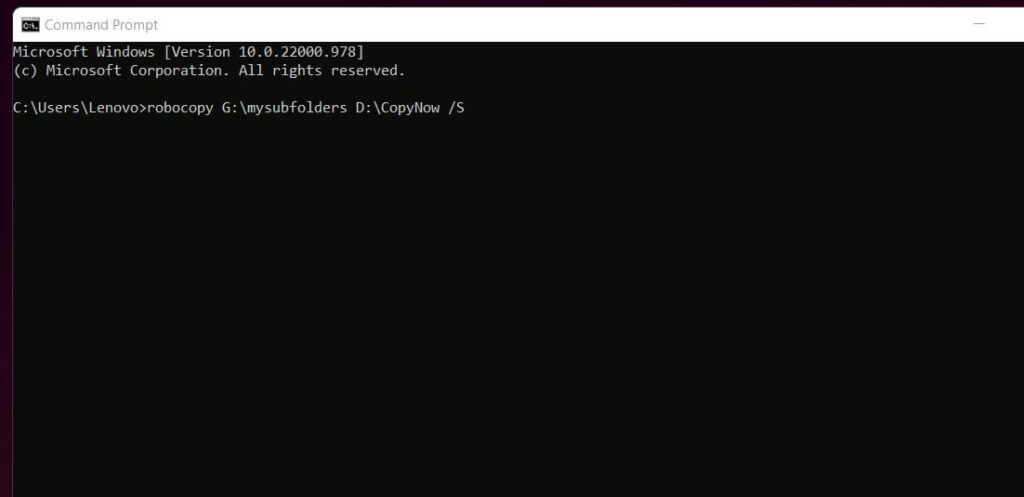
Our own example:
C:\Users\Paul> Robocopy >My/Source> <My/Destination> /S
Now in this S option is used to copy the sub-directories but not the empty ones, why have clutter?
Now you might have a question in your mind why one needs to know about it? Well, you can write a copy of it quite faster and more secured too. With this, you can also transfer files over servers and much more.
6 Best RoboCopy GUI For Windows 10/11 (Free Download)
Robomiror 2.0 – A Portable GUI
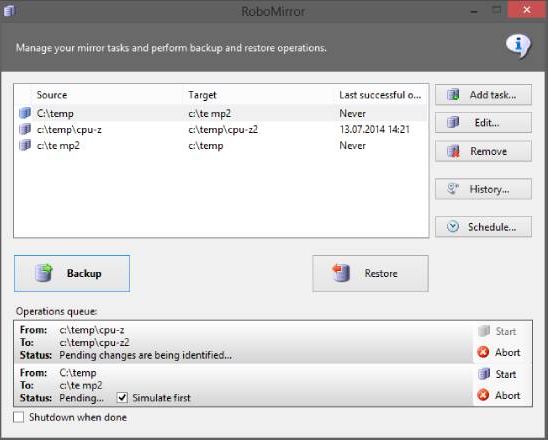
Simple software can be used to copy folders in windows. With a simple Graphical User Interface, you can create many mirroring tasks that you can run at the same time.
This specifies the source, additional command switched and destination directory in order to accomplish the function you desire. But as a list of RoboCopy commands switched is not available you need to specify them manually and save work.
This RoboCopy GUI portable software can create a task as well as specify the parameters of the switch. Moreover, you can also extract and delete files that exist.
Robocopy GUI – The name says it all
This seems to be one of the oldest yet most excellent GUI software. With this, you can specify the source folder from where you shall copy the file and then mention the destination folder where it needs to go. Moreover, you can also specify additional features for mirroring operation apart from the mirroring command.
Now what you can do is save the configuration for any mirroring job and then use it later. As it has a straightforward user interface you can quickly run it once the software has been installed. You can however also save the current configuration as a script.
This tool has been discontinued.
ChoEazyCopy – Best RoboCopy GUI tool
This is open-source software that comes in free. It is used to perform different functions. Once both source and destination folders are specified you can use command-line arguments and they switched to complete the task. You have the option to either perform the task instantly or later.
As it has a simple GUI it is straightforward in nature. As you have specified all parameters you can specify switched and command-line options you desire. Use the in-built search in order to find the desired switch there from the list of supported switches. Now you can finally copy the folder to the destination you desire while running the task.
ALSO SEE: Download Best SSH Clients for Windows 11 (Free).
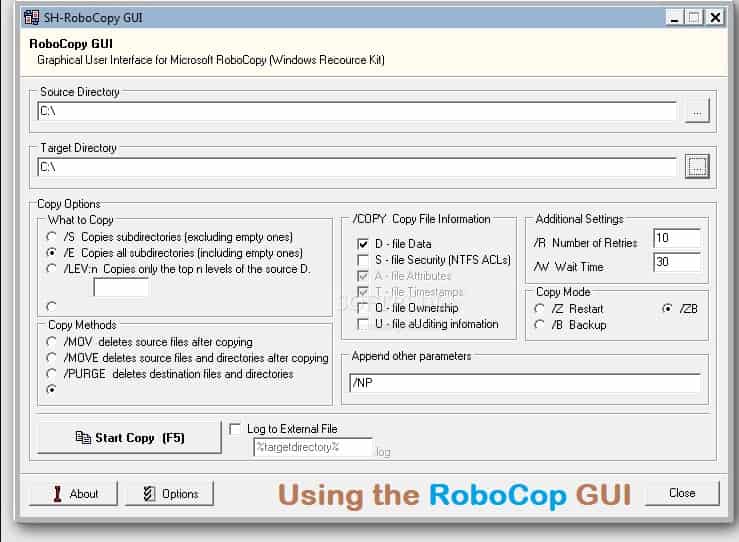
SH-Soft Robocopy GUI – PowerShell-supported GUI
This software comes with an interface through which you can copy and paste many files easily. It makes sure that third-party integrations smoothly run.
Now if you want to efficiently manage operations you need to specify the exact input and output for copy and paste function. This is a free licensed free software that works great for systems with both 32 and 64-bit Windows OS.
Robocop Clone – An all-rounder for file replication
If you are looking for a free RoboCopy GUI for Windows then this is a reasonable pick It is an open-source program through which you can specify source and destination codes and additional command line parameters in order to both files and folders.
Once the command line argument has been configured for the mirroring task you can save settings for later use. Finally, you can now both download and run the software with the purpose of mirroring folders that have been selected.
Download RoboCopy Clone with GUI
WinRoboCopy – Same as Microsoft RoboCopy
This is the same as the original Microsoft RoboCopy GUI tool. It comes free and offers a simple interface to mirror files and folders. Using this you can create different mirroring tasks, export commands for certain tasks and also save them.
You need to specify the source and the destination folder as well as additional command line options and switches. As you have saved the job you can use it per your needs.
ALSO SEE: How To Create and Execute a bash file in Raspberry Pi (With Script example).
How to use RoboCopy GUI and CLI to Copy any File or Folder
We are using a Windows 11 client machine in an active directory domain.
The command that has been mentioned below shall (not really) backup files there in the first location towards the file server (F:Photo_Backup).
C:\Users\Paul> Robocopy H:\Pauls_Photos F:\Photo_Backup
This shows your source and destination, which files you need to back up to, and what kind of options shall be used by it.
Sub-directories are not backed by default. There what needs to be done next is to include sub-directories. We can include these with /e switch to include all subdirectories, even the ones which are empty.
Now in spite of copying, we have the option to move files, for this, you need to use /move the switch
Nobody wants to copy all the files from one place to the other, you shall want to filter out which files are being copied.
We shall go through the prevalent switches to choose files by name, kind, size and others how? Well, by using wildcard characters you can select specific file names. Makes life very easy.
If you want to limit the size of the files you want to copy from a destination then use the /max option.
Now by using the powerful yet potential /mir command, we can keep two locations in sync. Every time you run this, anything not exactly the same in both source and destination shall be rectified.
If you delete a file from the source in practice, then it shall also get deleted from the destination. If someone deletes a file from the destination then it shall also get deleted from the source. This is the power of RoboCopy and how granular it can get! So select the options and switch wisely!
RoboCopy GUI FAQs
Is RoboCopy GUI free?
Yes, all RoboCopy GUI software are free to download and use on Windows. You do not have to pay to use RoboCopy.
Can I use Powershell in RoboCopy GUI?
Powershell is a scripting language for Windows systems used mostly for automating common tasks. RoboCopy GUI is used for copying files and replication and hence you can't use Powershell from RoboCopy GUI.
Is it safe to use RoboCopy from a GUI?
Yes it is much safer for you to use RoboCopy via a graphical interface as you will make less errors compared to using it from command prompt.
Other Windows 10/11 tutorials you will :
Final Words
Terminals and command lines are not for everyone and so for obvious reasons. RoboCopy is a great tool used for file transfer and replication, but it limits people who use it as they get confused while using the switches in a CLI. This is where RoboCopy GUI for Windows 10/11 come into play and allows you to use buttons with an interface.
For those interested, we have also included RoboCopy GUI download links. Do let us know your favorite RoboCopy command and maybe share some examples too!


")
")


")


")

I use Gs Richcopy 360.
Is that like a RoboCopy clone or alternative as I never heard of it before?
The /mir option does not delete files from the source if you delete files from the destination. The option only works in the direction source –> destination, not the other way round.
Hi Fred, thanks for point that out much appreciated.